Settings
The settings are divided in 4 tabs:
- Databases – where you configure the available databases, tables and columns.
- Import – where you configure the major import settings.
- Export – where you configure the major export settings.
- Info – where you verify your server configurations.
Databases
On this section you can add, edit or remove databases and select which tables and columns you want the system to use.
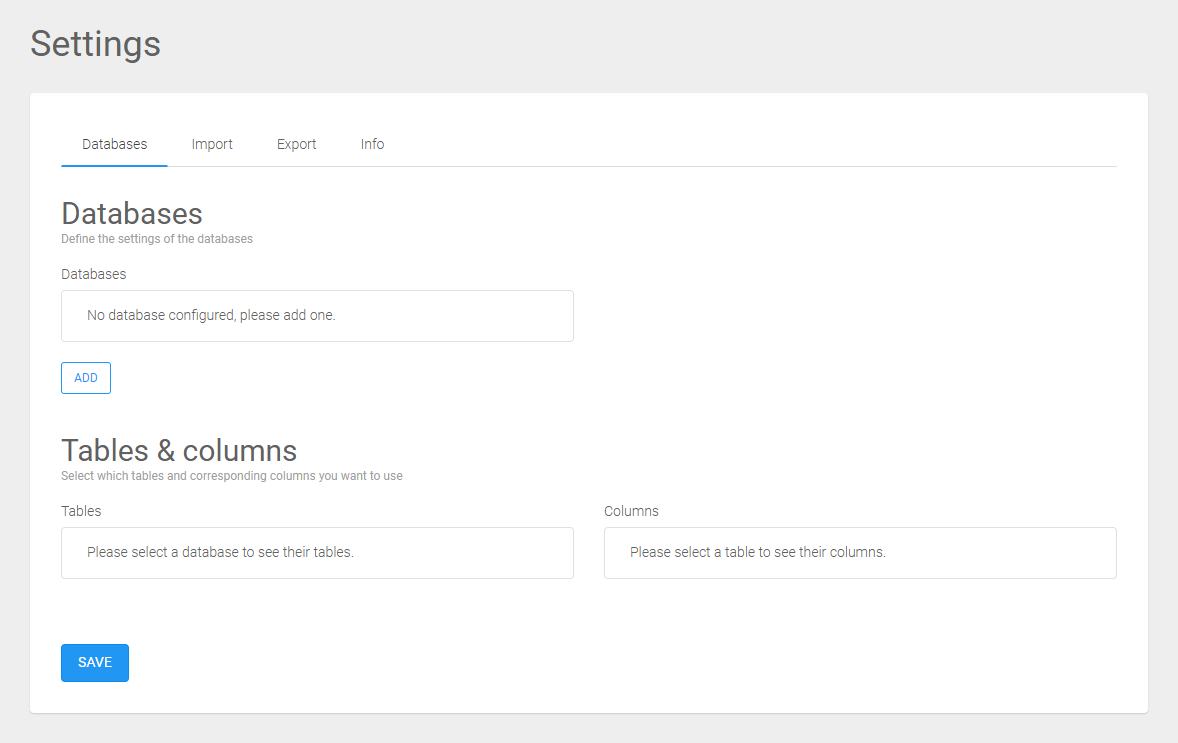
Adding databases to the system
Before you can start importing or exporting from a database, you first have to configure these databases in our application. Once you have configured this, you can always import or export right away without repeating this process. If you follow these quick steps, you can start in a matter of minutes!
- Click on the ADD button.
- As you can see, on the right of your screen, there are some new fields here.
- Please enter the correct information in all of these fields, and press on the OK button to save.
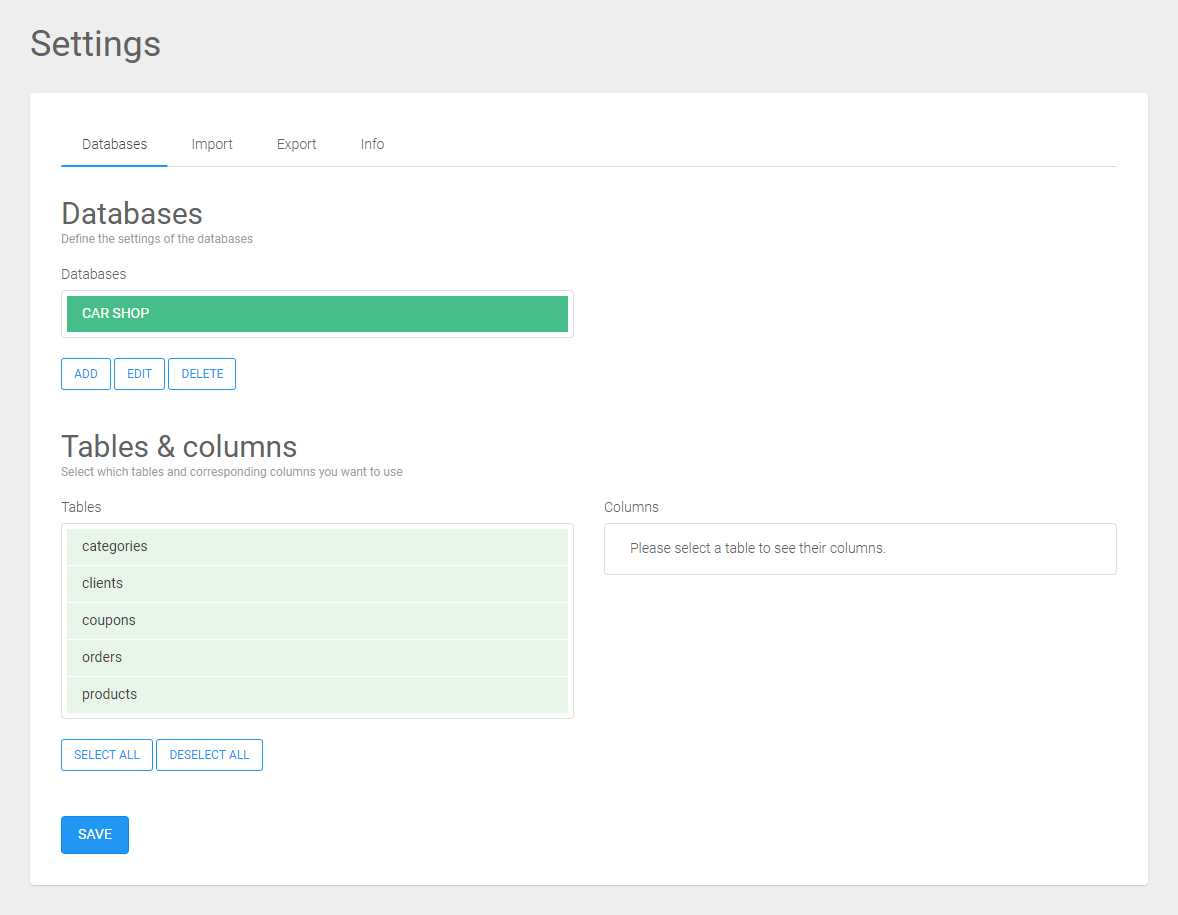
- If everything has gone well, your database has been successfully added in the left menu and is highlighted in green. After that if you whant, you can select which tables and columns you want to use.
- If something went wrong, your database will be added in the left menu but highlighted in orange. There will be no tables to select to because the system didn't manage to connect to the database with the access data you just inserted.
- You can make as many modificatoin you want, and once you are satisfied with the configuration you need to press on the SAVE button to definitely save all the configurations you just made.

Editing current databases in the system
If for some reason the password, username or server IP changes from one of your databases, you can easily adjust that as well in our system.
- Click on the database which you want to adjust and press the EDIT button.
- On the right side on your screen, new fields will appear. Please change the information as you wish, and when all is done, press the OK button.
- To finalize your changes, press on the SAVE button on the bottom of your screen.
Deleting current databases from the system
- Click on the database which you want to delete and press the DELETE button.
- The system will ask you one more time if you are absolutely sure about deleting the selected database. If you are sure, press the DELETE button. After this, your database has been successfully removed from our system.
Select available tables and columns for your database
When you add a database to our system, our system will assume by default that you want to use all the available tables and columns.
Ofcourse, if desired, you can change this to your own preferences. You can do this right away when you are adding a database, or later, when you want to change a database that has allready been inserted.
To select which tables and columns you want to use, you need to:
- Click on the desired database you want to change.
- As you can see, below the database list, on the “Tables & Columns“ section, there are some new fields here.
- Please select or deselect the desired tables
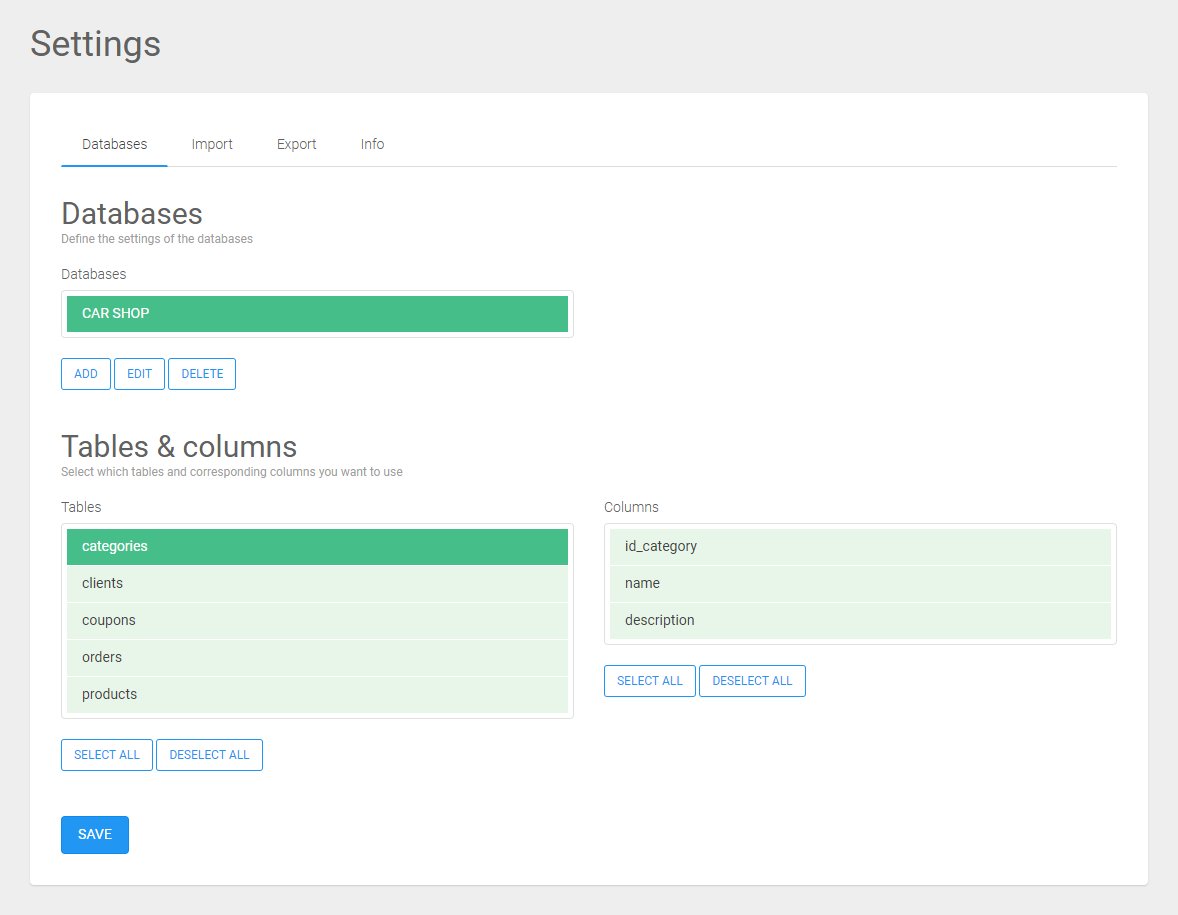
- To select a table you just need to click it once.
- To deselect you need to double click it.
- Every time you click on a table, the corresponding columns will show on the right, on the “Columns“ area.
- Select or deselect the columns you want.
- And when you are done, press the SAVE button to finalize your changes.
- If everything has gone well, our system gives you a notice that the settings have been succesfully saved.
Import
On this second tab you can configure the main import settings.
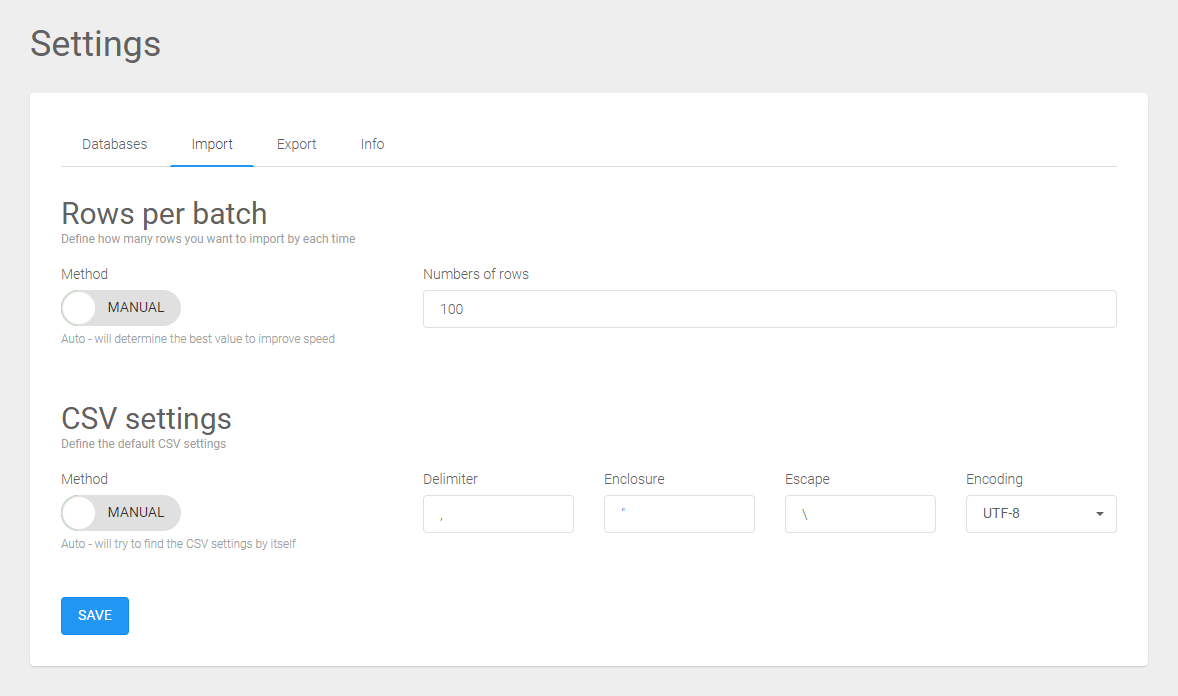
Rows per batch
With this option, you can define how many rows you want to import until the system takes a ”small pause” and starts getting the next batch of rows.
If you had a really large import to address, and your server didn't make that "small pause", your server might give a time-out or a memory error before the import has finished properly.
As standard, our system tries to detect how your server behaves, and chooses automatically the best configurations to improve the speed and the stability of the import. So in most cases, the AUTO method here is just fine.
However, you can override this auto function by putting it on MANUAL, and you will see that a new field will appear. In this field, ”Number of rows”, you can define how much rows per batch you want the system to use it. The lower the number you enter, the less time-out or memory errors might occur, but you will increase the time of the import.
When you are satisfied with your configuration, don't forget to click on the SAVE button.
CSV settings
Every CSV file has some specific characteristics, like delimiter, enclosure, escape and encoding.
As standard, our system will try to detect which characteristics are being used in your chosen CSV file, so in most cases, the AUTO method here is a good option.
If you want, you can override this auto method by selecting the MANUAL option. When you do that, you can see that 4 new fields will appear. Now you can define for yourself which Delimiter, Enclosure, Escape and Encoding your CSV files are using by default. On the import page, those values will appear by default when you select a file to be imported, but of course you can change and adjust those CSV settings for that specific file you just selected.
When you are satisfied with your configuration, don't forget to click on the SAVE button.
Export
On this third tab you can configure the main export settings.
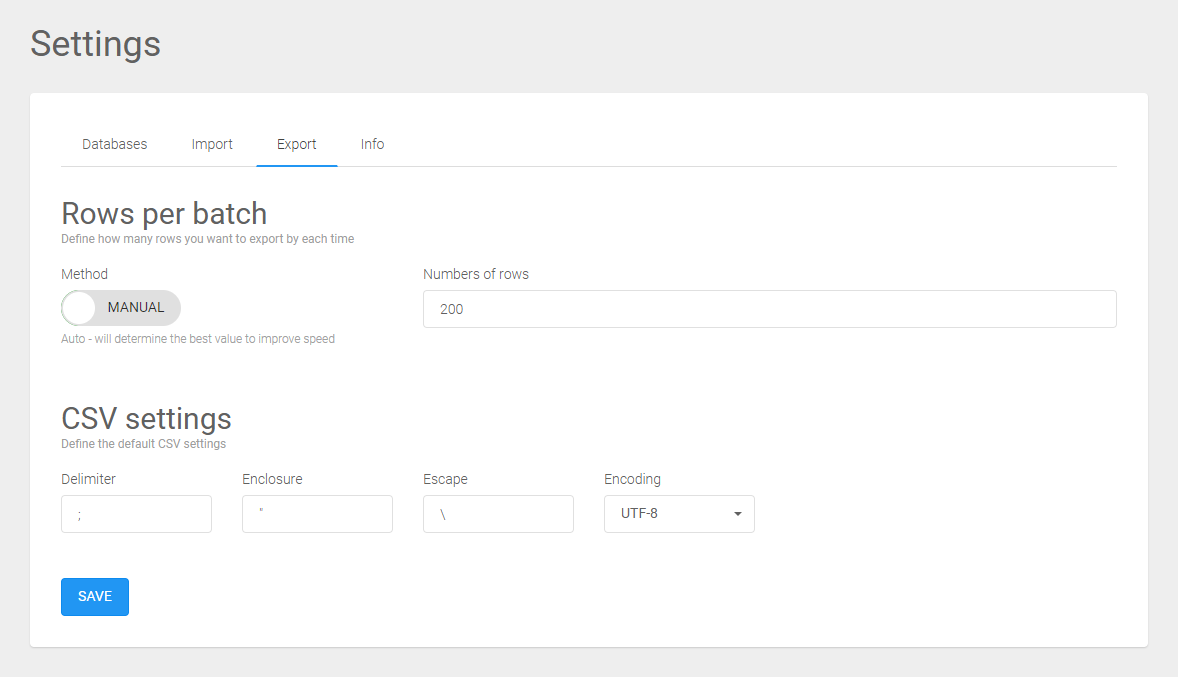
Rows per batch
With this option, you can define how many rows you want to export until the system takes a ”small pause” and starts getting the next batch of rows.
If you had a really large export to address, and your server didn't make that "small pause", your server might give a time-out or a memory error before the export has finished properly.
As standard, our system tries to detect how your server behaves, and chooses automatically the best configurations to improve the speed and the stability of the export. So in most cases, the AUTO method here is just fine.
However, you can override this auto function by putting it on MANUAL, and you will see that a new field will appear. In this field, ”Number of rows”, you can define how much rows per batch you want the system to use it. The lower the number you enter, the less time-out or memory errors might occur, but you will increase the time of the export.
When you are satisfied with your configuration, don't forget to click on the SAVE button.
CSV settings
Every CSV file has some specific characteristics, like delimiter, enclosure, escape and encoding.
Here you can define which Delimiter, Enclosure, Escape and Encoding your exported CSV files will have by default. On the export page, those values will appear by default for the exported file, but of course you can change and adjust those CSV settings for your desired configuration.
When you are satisfied with your configuration, don't forget to click on the SAVE button.
Info
On this fourth tab you can review your PHP server settings.
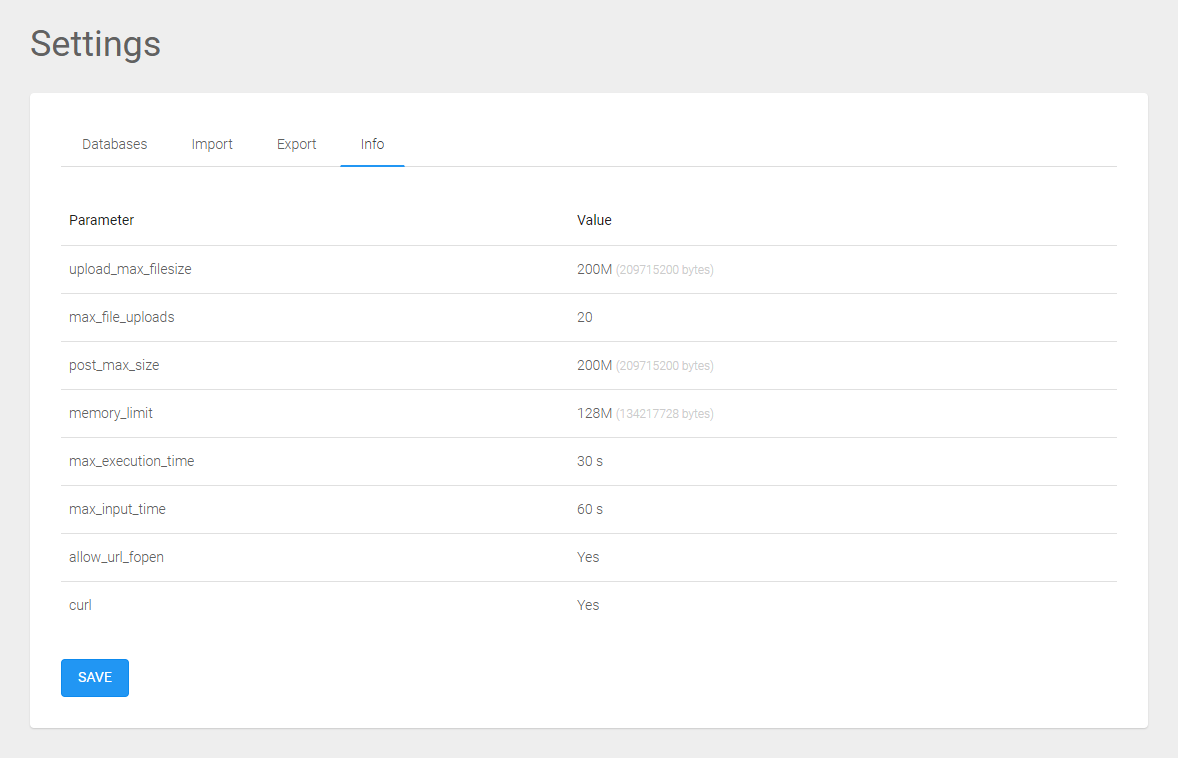
In this screen, you can view the settings of your PHP server. This might be useful when you are encountering erros that could be related to some compatibility of your server, and also could be useful for us to give you the propper support based on your server configuration.
Just as a reminder, these are the settings of your server and not of our system. If you want to change them, you will have to adjust it for yourself in the administration panel of your server or contact your hosting provider.